Air-Sealing an Attic Hatch in Calgary: Stop a Hidden Winter Draft
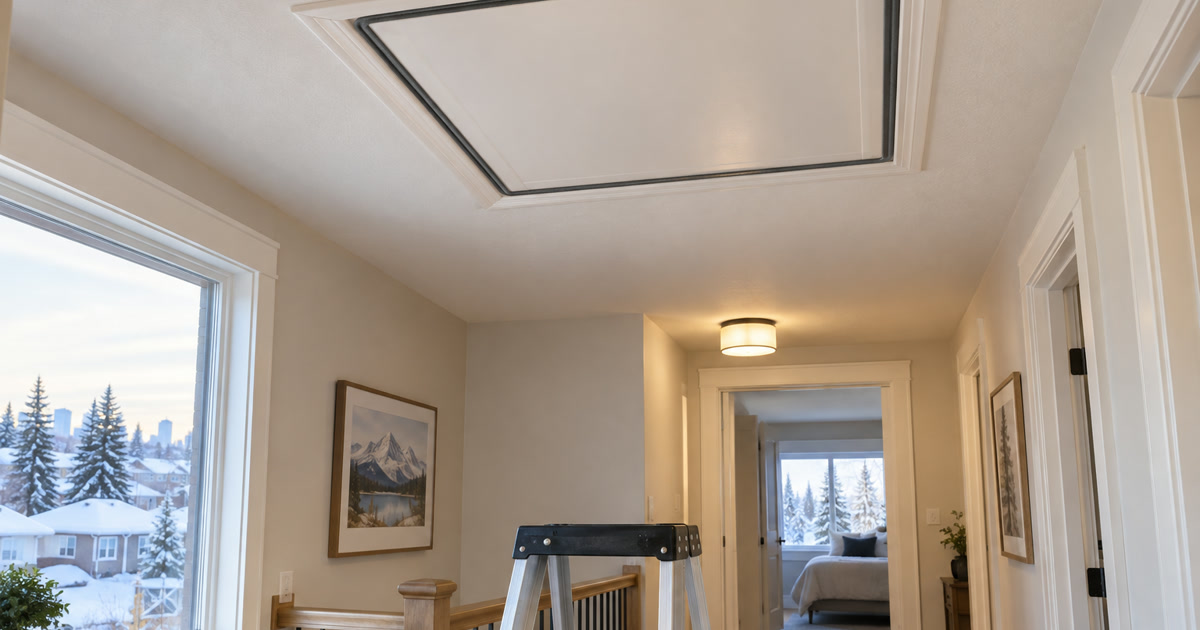
An attic hatch can look harmless: a painted panel in a hallway ceiling, a pull-down ladder in the garage, or a small door tucked into a closet. But if it does not close tightly, it can become one of the easiest paths for warm indoor air to escape from a Calgary home. That escape can make the room below feel chilly, leave the hatch dusty around its edges, and feed moisture into a cold attic.
This is a smart fall task to finish before the first sustained cold stretch. Environment and Climate Change Canada’s 1991–2020 climate normals show Calgary’s average overnight lows dipping below freezing by October, so a loose attic hatch is worth fixing before winter settles in. See the official Calgary climate normals.
Why an Attic Hatch Matters in Calgary
Warm air naturally rises. In a heated house, air that leaks through an attic hatch carries heat and household moisture into a much colder space. The result may be a cold hallway, a faint draft around the trim, or frost near the hatch after a sharp cold snap.
Calgary’s fast temperature swings make this small opening more noticeable. A chinook may make the house feel comfortable one day, then a cold front follows and exposes every weak seal. Homes in established communities such as Haysboro, Brentwood, and Acadia often have attic access panels that have been painted over, warped slightly, or never fitted with a proper gasket.
An airtight hatch is not a substitute for a healthy attic ventilation system or adequate insulation. It is simply one practical place to stop conditioned air from taking a shortcut outdoors.
Five Signs Your Attic Hatch Is Leaking Air
Start with a quick inspection from inside the home. You do not need to climb into the attic to spot the most common attic hatch problems.
- The panel rattles or shifts when you press it. A hatch should sit firmly in its frame, not rest loosely on trim.
- You can see a gap or dark line at the edge. Even a narrow, continuous gap can let warm air move into the attic during a long winter.
- The ceiling below feels noticeably colder. Compare the area beneath the hatch with a nearby room on a chilly morning.
- Dust gathers in a line around the frame. Moving air often leaves a telltale dust track where the hatch meets the opening.
- There is staining, frost, or dampness in the attic near the opening. Do not ignore this. It may point to air leakage, but it can also be a roof or ventilation issue that needs a proper assessment.
If the hatch is in a garage, treat it as an especially important check. Garages are usually colder than the living space, and an unsealed garage-side attic access can add another cold-air path around the home.
What You Need for a Simple Attic Hatch Seal
Most homeowners can tackle a basic panel-style hatch with a short list of supplies:
- Adhesive-backed closed-cell weatherstripping sized to match the hatch edge
- A clean rag and mild cleaner for the frame
- A utility knife or scissors
- A straightedge or tape measure
- An insulated attic-hatch cover or rigid foam board assembly sized to sit over the opening from the attic side
- Work gloves, eye protection, and a stable step stool
Choose weatherstripping that springs back after being compressed. Very soft open-cell foam can flatten quickly, especially when an attic hatch is opened and closed several times through the year. The goal is a continuous, gentle compression seal—not a hatch that needs to be forced shut.
How to Air-Seal an Attic Hatch
1. Check How the Panel Actually Closes
Before adding anything, close the hatch and look at every edge. Some access panels sit on a narrow ledge; others fit inside a frame. The weatherstripping belongs on the surface where the panel will press against it all the way around.
If the panel is bowed, water-damaged, or too small for the opening, a gasket alone will not solve the problem. Our technician can rebuild the simple frame or replace the panel so it closes squarely.
2. Clean the Contact Surface
Old paint flakes, dust, and attic insulation fibres can keep adhesive weatherstripping from sticking. Wipe the ledge or frame clean, let it dry completely, and remove only loose material. This small preparation step matters in homes where a hatch may not have been opened since the last renovation.
3. Apply One Continuous Gasket
Run the weatherstripping around the full perimeter without leaving gaps at the corners. Cut each section cleanly and press it down firmly. Then close the panel and check that it touches the gasket evenly.
Do not stack several layers of weatherstripping to compensate for a badly fitting panel. That can make the hatch hard to operate and may pull the adhesive loose. For a persistent gap, correcting the fit is the better repair.
4. Add Insulation Above the Hatch
A gasket stops moving air; an insulated cover helps slow heat loss through the hatch itself. From the attic side, place a lightweight insulated cover over the opening so it overlaps the frame and can be lifted off when access is needed.
Keep loose attic insulation out of the way while you work, and do not block vents, electrical junction boxes, or anything that needs service access. A cover should be easy to remove without crawling through or compressing a large area of insulation.
5. Test It on a Cool Day
After the seal is installed, stand beneath the hatch on a cool morning and feel around the edges with the back of your hand. You can also hold a thin strip of tissue near the seam; obvious movement suggests air is still flowing.
Repeat the test after the next Calgary chinook or cold snap. Big temperature changes often make a remaining draft easier to find.
Do Not Create a New Problem While Fixing the Draft
Air-sealing should be tidy and reversible. Avoid these shortcuts:
- Do not tape the hatch permanently closed. An attic access needs to remain available for inspection and future work.
- Do not cover electrical equipment or bury fixtures that require clearance. If the attic has unfamiliar wiring, stop and arrange the appropriate qualified help.
- Do not pack loose insulation into the opening. It may slow heat loss, but it will not create a reliable air seal and makes future access messy.
- Do not assume every attic moisture mark comes from the hatch. Roof leaks, bathroom exhaust ducts, and ventilation issues can look similar. A YOFF technician can help identify whether the hatch is the real source before you spend time on the wrong repair.
A Good Fall Checklist for Calgary Homes
The best time to seal an attic hatch is during a calm fall weekend—before snow and deep cold make attic work less pleasant. Add the hatch to the same home-maintenance walk-through as exterior caulking, door weatherstripping, and furnace-filter checks.
Homeowners in wind-exposed Calgary areas such as Bowness, Tuscany, and the west side often notice drafts sooner, but every home benefits from checking this small opening. Make a second quick check in late winter, particularly if you have seen frost in the attic or unusual condensation on ceilings.
When to Call a Calgary Handyman
A straightforward gasket and cover are practical DIY work. Call a handyman when the opening needs reframing, the panel is damaged, attic insulation must be restored around the access, or you find signs of persistent moisture. If the issue appears tied to the roof, the wiring, or mechanical equipment, a roofer, an electrician, or a heating/HVAC company should assess that part of the work.
YOFF Home Services helps with small air-sealing repairs, attic-access improvements, weatherstripping, and practical fall maintenance across Calgary—from older homes in Renfrew to newer properties in Mahogany.
Related Calgary Home Guides
- Asphalt Driveway Sealing in Calgary: Fall Crack Repair Guide
- Window AC Removal and Winter Storage: A Calgary Homeowner's Guide
- Caulking 101: Bathroom & Kitchen Sealing That Lasts
Frequently Asked Questions
How do I know if my attic hatch is leaking air?
Look for a panel that rattles or shifts when pressed, a visible gap or dark line at the edge, or a line of dust around the frame. On a cold Calgary morning, the ceiling area under the hatch may also feel noticeably cooler than nearby rooms. A strip of tissue held near the seam will flutter if air is moving.
What kind of weatherstripping works best on an attic hatch?
Adhesive-backed closed-cell foam that springs back after being compressed is a good choice. Soft open-cell foam tends to flatten quickly, especially on a hatch that gets opened a few times a year. Apply it as one continuous gasket with no gaps at the corners.
Can I just put insulation batts on top of the attic hatch?
Insulation above the hatch helps slow heat loss, but it does not stop air from leaking around the edges. You need both: a gasket to block air movement and a removable insulated cover on the attic side. Avoid packing loose insulation into the opening, since it makes future access messy and does not seal.
When is an attic hatch repair a job for a handyman?
If the panel is warped, damaged, or too small for the opening, a gasket alone will not fix it. A handyman can reframe the opening or replace the panel so it closes squarely. Moisture, frost, or staining in the attic should also be assessed before you assume the hatch is the only cause.
The Bottom Line
An attic hatch is a small detail with an outsized effect on comfort. A clean frame, a continuous gasket, and a removable insulated cover can help a Calgary home hold onto warm indoor air through winter swings. If your hatch will not close flat or the attic shows moisture signs, YOFF can help you sort out the practical repair before the cold weather arrives.
Feeling a draft from the attic hatch? Our technician can fit a continuous gasket, add an insulated hatch cover, or rebuild a warped panel so it closes flat. Book a visit with YOFF at a time that fits your schedule.
Rather have YOFF handle it?
We cover seasonal and more across Calgary and nearby communities — booked fast, done right. No Fix — No Fee.